When we took the engine off CholoCycle we realized several things. We had a lot of space for batteries, several anchor points to mount stuff, and sadly, one of the previous owners had tried to cut the frame :(. This meant we had to dismantle the frame so we could take it to an experienced welder who can weld aluminum. Thanks to Scott from the Central Machine Shop for helping us out!
Someone tried cutting the frame
Before
The first thing we did after taking the fairings and seat off was to make a mock-up of our motor. We conveniently found a PVC pipe that was around the same diameter as our motor.
Motor model fits pretty well
Motor model picture from top
Motor model picture from the chain side
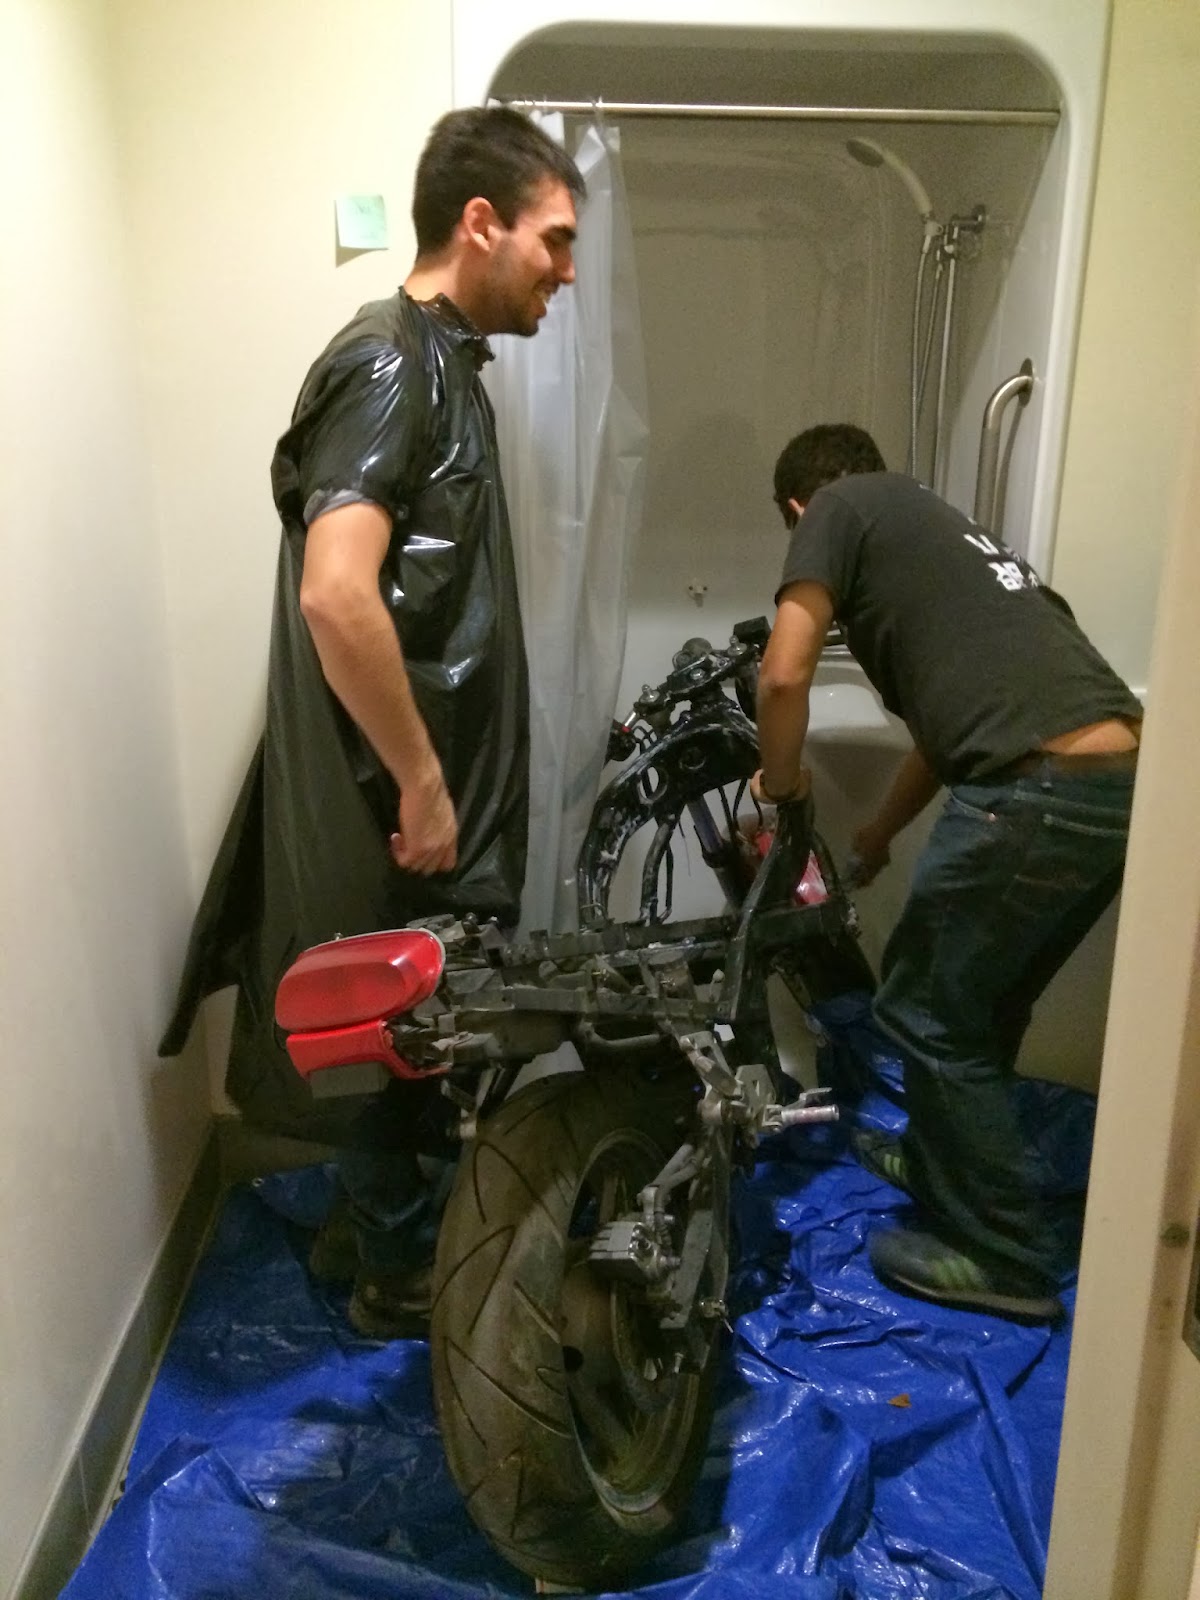
While we were looking for the best place to mount the motor we realized how dirty the frame was. We had three options to clean the bike: 1. Bring a bucket of water and rags to the shop and wipe it down. 2. Roll it home and hose it down. 3. Roll it next door to D-Lab and shower it..... literally
Our Spanish friends are helping us wash choloCycle
Yup, it's going in the shower; Hmm, Camilo doesn't want to get his shirt wet.
Look at that Spanish ingenuity
Working hard. I should be a manager.
Squeaky Clean! :D
Now that CholoCycle is clean we cut out cardboard to make a quick model of the aluminum plate we would use to mount the ac-20.
Quick cutout of one of the motor mounts
Zip-tied motor model in place
First motor mount in place; third anchor point needed.
Much better picture of the motor mount. Oh Hai Roberto
The first two anchor points for the motor mount were not hard to find. The only problem with them is that they are not coplanar. This means we will have to make a spacer for at least one of those mounting points. More on that later! For the third mounting point we are thinking about welding a piece of c-channel (or maybe L-bracket) onto the side of the frame. We would then bolt the motor mount onto that c-channel so the mount is removable.
C-Channel welded on red square
There goes the front wheel....
Back wheel and swing arm are off too..
Time to take to the welder...
Who came up with the best way of carrying the chassis? Roberto? or...
After taking apart the frame we also made new battery mock-ups. We settled on two different configurations. One in which we have the two batteries mounted side by side vertically. This means we would have to cut the cross-arm that joins the two sides of the frame. The second configuration would not require us to cut off the cross-arm. We would place them on top of each other in a criss-cross pattern. We still don't know which batteries we are getting but it seems that all the batteries will have the same width and height. For this reason we think that the vertical configuration would allow us to use longer modules.
Vertical Battery Configuration
Vertical Battery Configuration Side View
Criss-Cross Battery Configuration
Criss-Cross Battery Configuration Top View
Looks like the Sevcon Controller is arriving tomorrow and the ac-20 will arrive very soon too. More to come in the next couple of days!
Victor and I have been wanting to make an electric motorcycle for the longest time. This summer we actually started planning and budgeting everything out. over the last couple of months we had been craiglisting and going over different places in MA to spec out bike but couldn't find an appropiate one.About 2-3 weeks ago we were fortunate to receive techX project funding. We got $500 funding that we decided to put towards the frame acquisition. We intensified our craiglist search and last week we found some guy in dedham that had a bunch of bikes with blown engines he was willing to sell to us. We visited his sketchy ass shop (seriously, it looked like an abandoned warehouse from outside) and we found a kawasaki ZX-6R that we liked.
proud parents!
We brought the frame back to MIT and the next day starting gutting the bike.
We brought the frame back to MIT...
...and the next day starting gutting the bike.
taking out the carbs
taking off the radiators
Time to take out the engine!
This turned out to be a much tougher job than we expected even considering we had 5 people (plus a camera-man) working on this.
Let's try to lift the whole bike upwards.
Hmmm, that didn't work...How the hell did they even get this engine inside there in the first place?!
Let's try to lift only the back....
After several different attempts we finally managed to separate the engine from the chassis.
Finally the engine is out!
Couldn't let that snapchat disappear
Look at all that space!
SO HEAVY.
Taking off the engine was a cool and rather challenging task, we put a jack and a piece of wood under the bike and then unbolted the engine and then lifted the bike off the engine. This last part was especially tricky given the weird shape engines have. Nevertheless, after about 3 hours we were done! Thanks to Esther M., George H, Heidi B., Charlesg and Rachel D.C. for their help in the gutting!We took all the stock fairings off cause they were in pretty crappy condition and we are gonna buy a body kit for the bike. Here are some options we found: http://tinyurl.com/cholocycle. I put up a poll to ask our friends on fb what color the bike should be. We got pretty hilarious responses, check them out below:Roberto and I went to N52 today and laser-cutted a cardboard mock-up of one of the batteries we are considering. We tried several configurations. Our two main concerns are that we need to leave space for the motor (modeled as the red circle in the first picture) and we want the batteries as low as possible for a lower center of mass.
Probably the best configuration
Maybe vertical?
This might actually work too. Clearance worries me a little though
We considered this for a second
Until we realized where all the weight of the bike would go if we drop choloCycle.
With the frame gutted, I started the mechanical design for the battery and motor holder. I was looking for some CAD for the ninja and stumbled upon this gem. A guy named Daniel Nguyen made a CAD of a ninja for his Intro to Cad class in UCLA. He intended to CAD the 2009 Ninja but he used the specs from a service manual for the 2002 model, which is the model we bought! I emailed daniel and he was gracious enough to let us have the CAD! Woohooo!We imported the CAD to solidworks and got rid of fairings and engines and exhaust etc and gave it some colors.
So pretty!
We mainly need the frame CAD so we can fit batteries and motors and whatever mounts we have.We are in the process of buying more stuff for the motorcycle (like motor and trying to get some batteries). We'll keep posting stuff during the build! Any questions let us know in the comments below.
As part of MIT IAP (Independent Activities Period) I took part in an Impractical Bicycle Dynamics Class. The class was led by Jack Whipple (D-lab Shop Manager) and Mars (Crazy Bike Expert), the point of this class was to create unconventional bicycles that were still somewhat rideable.
The class had 4 teams of 2 people each. The bikes constructed were:
1. (My team) "Bucky" A bicycle where arms provide propulsion and legs provide steering.
2. Snowmobike: A pedal powered contraption with a huge snowmobile tanktread.
3. Chopper: A chopper style bicycle.
4. Tall+Cargo: A tall bike that also has space for cargo.
You can find more details on each bike at the class website: aibd.mit.edu.
During the last day of class we had a small crazy bikes party outside of N51, here is a small video of the most incredible moment of that day, MARS RIDING BUCKY!
Many thanks to the instructors of the class for putting it together! I really hope AIBD becomes an IAP classic at MIT and as a result that the bicycle hacking community at MIT grows!
About a month ago one of my professors invited me to be part of a speaker building seminar with Bose. The purpose of this seminar was to expose us to the kind of stuff that Bose does, learn some basic acoustic theory and build some speakers!
The seminar was amazing, the guys from Bose explained some really cool features they put into their products. They showed us this "magic sound wand" which they could use to point at some location and make sounds seem like if it was coming from there. It was kinda spooky but awesome. We also learned a bunch about the use of crossover to give you better sound quality. One of the coolest things they showed was how they designed a new type of speaker cone which exhibits no parasitic harmonics under the audible range and thus was able to produce a pure note much better than a normal speaker cone. (I wish I had a video of this but they had a strobe going in the demo, so it was hard to film).
pink cone has parasitic modes, waffle cone (blue) gives you a much more pure note and no parasitics
bose dude holding the magic sound wand
The speaker building part was pretty fun too! We build two speaker cabinets out of PVC and MDF. At the end of the seminar we all put our speakers together and were able to play a 30 track piece in lobby 13!