Hey folks, its been long since the last update. This was a busy semester (but my last, yay!). I spent the last couple of weeks debugging the sevcon controllers to work with my AC-20.
I rigged up my testbed in the EVT room.
EVT test room
making sure to keep tires off the ground
Sevcon espAC with the bike
in the process of testing cholo ride, I had to revive two dead cells in this pack
putting the controller into the bike!
bike with zip tied batteries (better batteries and battery mounting coming soon!)
blown fuse!!!! during some auto-tune testing
power supply+espAC for autotuning
After struggling with the sevcon for a couple of hours Dgonz and I finally got this to happen!
Finally we waited for sunny sunday to do this:
I rode it around campus for a bit (i didn't want to ride too much given the bike is totally not street legal right now). Lots of fun! I Still need to mess around with the settings and fine tuning of the motor to get 100% of the motor potential. Currently I have a 72V 15Ah LiFePO4 pack (1kWh), I am hoping to upgrade this to 5kWh soon. I am also waiting for a sevcon gen4 size 6 to arrive to finish the bike.
[a more comprehensive update for the sevcon troubleshooting will be coming soon! in the meantime follow this as it is the best online tutorial that I found, credit to dgonz for all the sevcon help]
When the motor arrived we checked the laser cut clamps with the actual motor and then it was time for some waterjetting!
good fit!
waterjet pieces!
Roberto did some post machining on the water jet pieces, he drilled and tapped holes for the starboard clamp.
We also machined the sprocket with its bolt circle and its bore.
With the pieces waterjet and post machined it was motor mounting time! Roberto and Jacob spent part of their friday night putting the motor in. It took a while but it came out great!
the chain is on!
Our next big challenge is to get our Sevcon Gen4 driving the motor. Stay tuned for more updates!
A really big thanks to our friends at elmoto.net especially the folks that responded to our thread (big shout-out to Noah Podolefsky and Ted Dillard for their resources on AC-20 motor mounting.
When we took the engine off CholoCycle we realized several things. We had a lot of space for batteries, several anchor points to mount stuff, and sadly, one of the previous owners had tried to cut the frame :(. This meant we had to dismantle the frame so we could take it to an experienced welder who can weld aluminum. Thanks to Scott from the Central Machine Shop for helping us out!
Someone tried cutting the frame
Before
The first thing we did after taking the fairings and seat off was to make a mock-up of our motor. We conveniently found a PVC pipe that was around the same diameter as our motor.
Motor model fits pretty well
Motor model picture from top
Motor model picture from the chain side
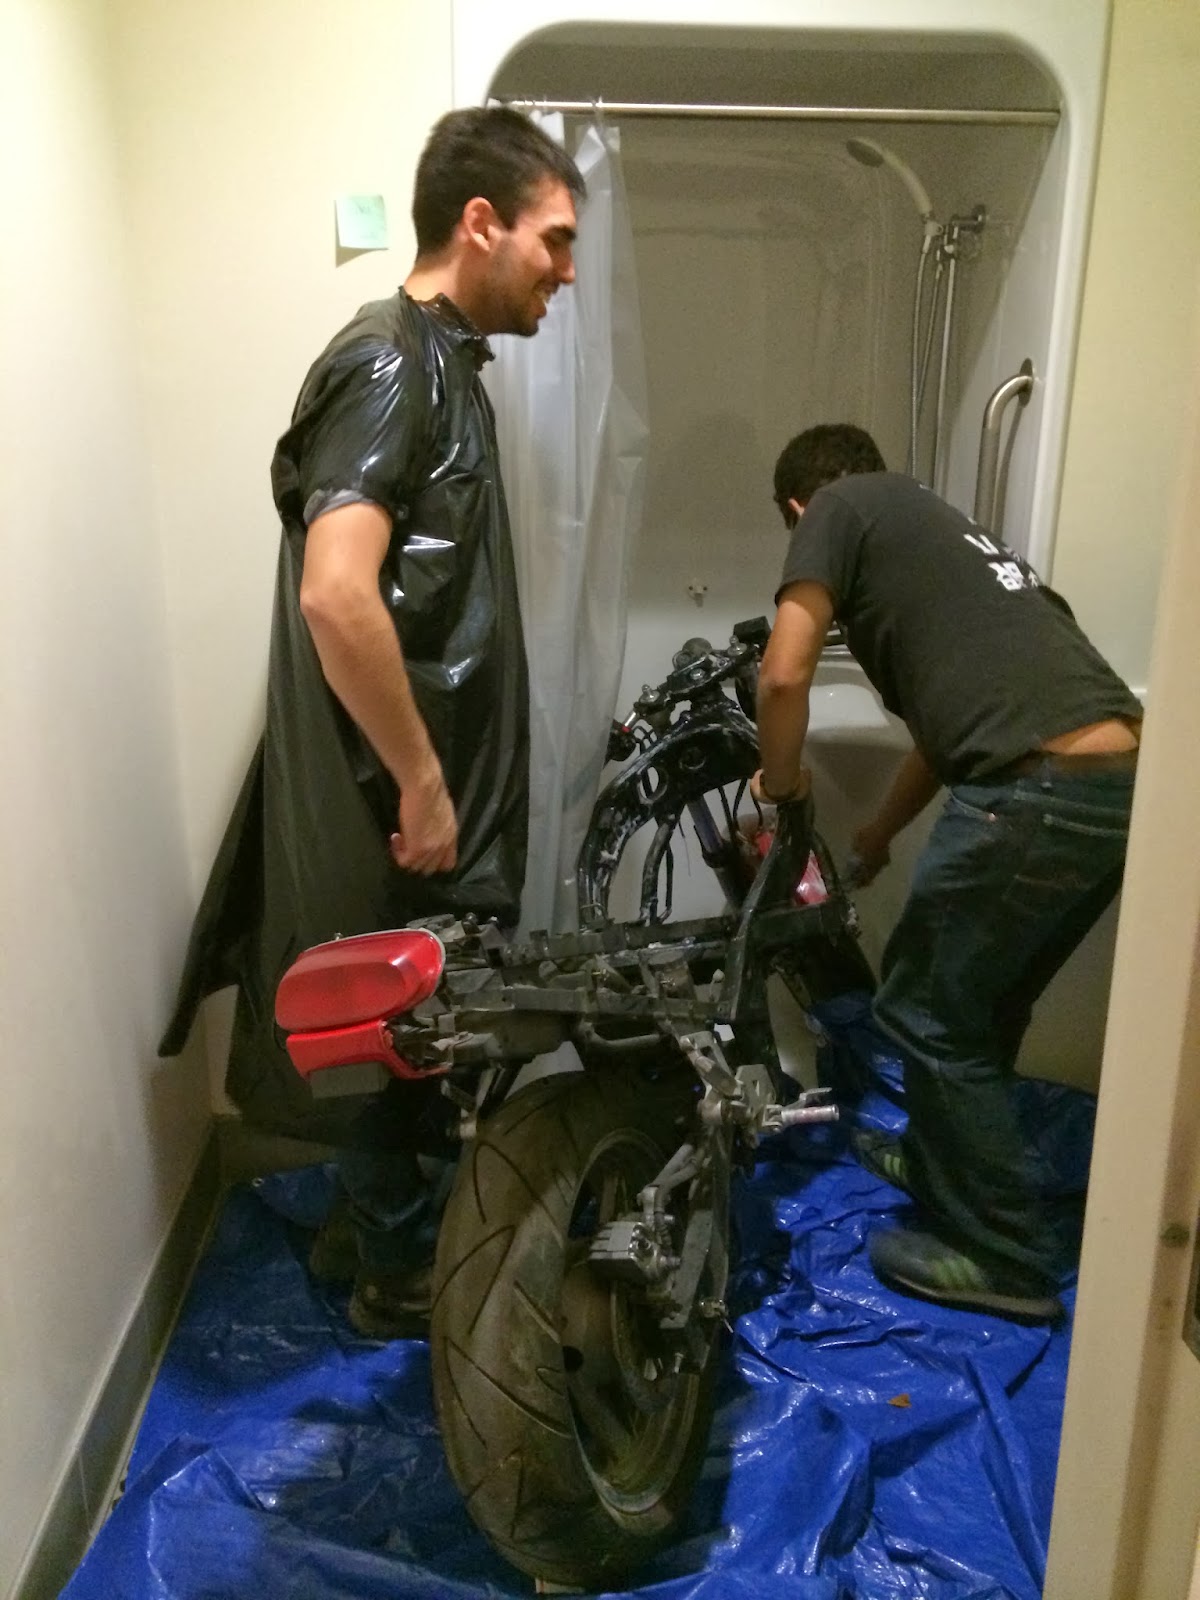
While we were looking for the best place to mount the motor we realized how dirty the frame was. We had three options to clean the bike: 1. Bring a bucket of water and rags to the shop and wipe it down. 2. Roll it home and hose it down. 3. Roll it next door to D-Lab and shower it..... literally
Our Spanish friends are helping us wash choloCycle
Yup, it's going in the shower; Hmm, Camilo doesn't want to get his shirt wet.
Look at that Spanish ingenuity
Working hard. I should be a manager.
Squeaky Clean! :D
Now that CholoCycle is clean we cut out cardboard to make a quick model of the aluminum plate we would use to mount the ac-20.
Quick cutout of one of the motor mounts
Zip-tied motor model in place
First motor mount in place; third anchor point needed.
Much better picture of the motor mount. Oh Hai Roberto
The first two anchor points for the motor mount were not hard to find. The only problem with them is that they are not coplanar. This means we will have to make a spacer for at least one of those mounting points. More on that later! For the third mounting point we are thinking about welding a piece of c-channel (or maybe L-bracket) onto the side of the frame. We would then bolt the motor mount onto that c-channel so the mount is removable.
C-Channel welded on red square
There goes the front wheel....
Back wheel and swing arm are off too..
Time to take to the welder...
Who came up with the best way of carrying the chassis? Roberto? or...
After taking apart the frame we also made new battery mock-ups. We settled on two different configurations. One in which we have the two batteries mounted side by side vertically. This means we would have to cut the cross-arm that joins the two sides of the frame. The second configuration would not require us to cut off the cross-arm. We would place them on top of each other in a criss-cross pattern. We still don't know which batteries we are getting but it seems that all the batteries will have the same width and height. For this reason we think that the vertical configuration would allow us to use longer modules.
Vertical Battery Configuration
Vertical Battery Configuration Side View
Criss-Cross Battery Configuration
Criss-Cross Battery Configuration Top View
Looks like the Sevcon Controller is arriving tomorrow and the ac-20 will arrive very soon too. More to come in the next couple of days!